How to Curl Short Hair: Techniques, Tools, and Styles for Pixies, Bobs, and Lobs
There is a persistent myth that short hair is limiting, and whoever started it has a lot to answer for because it has been convincing women to skip the curling iron for decades based on absolutely nothing.
A pixie, bob, or lob is not a sentence to wear your hair exactly one way forever. It’s actually one of the most versatile canvases for texture, movement, and curls that exists if you know what you’re doing with it.
The honest part is that curling short hair does come with its own specific challenges because you’re working in tight quarters, and the wrong technique gives you a poofy mushroom situation or a burn you’ll be explaining for a week, and neither of those outcomes is what we’re here for.
This guide covers the best tools for short hair, the precise techniques that prevent both disasters, and step-by-step tutorials for every popular short cut, so that by the end of it, your short hair stops feeling like a limitation and starts feeling like the most interesting thing about your whole look.
Part 1: The Foundation – Preparation and Safety for Short Hair
Before you plug in any hot tool, you need to set yourself up for success and safety. Short hair puts the heat source very close to your skin, so preparation is non-negotiable.
A. The Golden Rule: Protect Your Skin
When you’re curling shoulder-length hair, the hot tool is often far from your scalp and neck. With a pixie or bob, that 350°F barrel is hovering millimeters from your ear, your temple, and the nape of your neck. Burns are a real and painful possibility that I want you to be fully aware of.
Essential Safety Tools:
- Heat-Resistant Glove: This is not a luxury, I repeat, not a luxury. It’s a necessity for short hair. The glove goes on the hand you use to hold the hair sections. It allows you to get close to the scalp and wrap hair around the barrel without flinching every time you feel heat. You can find these inexpensively at beauty supply stores or online.
- Tail Comb Barrier: This is a genius hack. Hold a rattail comb flat against your skin (for example, over your ear or along your neck). Place the hot tool on top of the comb. The comb acts as a physical heat shield, protecting your delicate skin from direct contact with the iron or wand.
- The Cool Tip: Most curling wands and some flat irons have a cool, rubberized tip at the end. Use this to steady the tool with your free hand. It gives you control without burning your fingertips.
B. Hair Prep for Short Lengths
The way you prep short hair differs slightly from long hair. Because there’s less length to weigh products down, you must be careful about what you apply.
- Dryness: Your hair must be 100% dry before using a hot tool. This is the universal rule of heat styling. Using hot tools on damp hair can cause severe heat damage, including “bubble hair,” where moisture trapped inside the hair shaft expands and weakens the strand
- Heat Protectant: Apply a lightweight spray or foam to the mid-lengths and ends. Avoid heavy creams or oils that can make short hair look greasy. If you have a pixie, a spray is best because you can mist it lightly over the top layer without saturating the roots.
- Texture Products (Your bestie): Short hair often lacks the weight to hold a curl. It needs grip. Day-old hair is ideal because natural oils add texture. If your hair is freshly washed, saturate the roots and mid-lengths with a texture spray, dry shampoo, or a sprinkle of volumizing powder. This gives the hair “tooth” so the curl can cling to something.
C. Sectioning Short Hair: The “Mini Section” Strategy
Standard alligator clips are often too big and clunky for short hair. They slide out or don’t hold the small sections in place.
Use small jaw clips (the tiny colorful ones from the 90s are perfect for this) or duckbill clips. These short grip pieces securely hold the pieces without leaving dents.
How to Section:
- Top / Mohawk Section: From the middle of your forehead straight back to the crown of your head. Clip this up first.
- Side Sections: The hair over each ear. Clip these up separately.
- Nape Section: The very bottom hair at the back of your neck. Leave this down to work on first.
Part 2: The Best Tools for Curling Short Hair
Not all curling tools are created equal, especially when dealing with shorter lengths. A giant 1.5-inch wand is overkill for a pixie. Here’s what you should reach for.
A. Flat Iron (0.5″ to 1″ Plates)
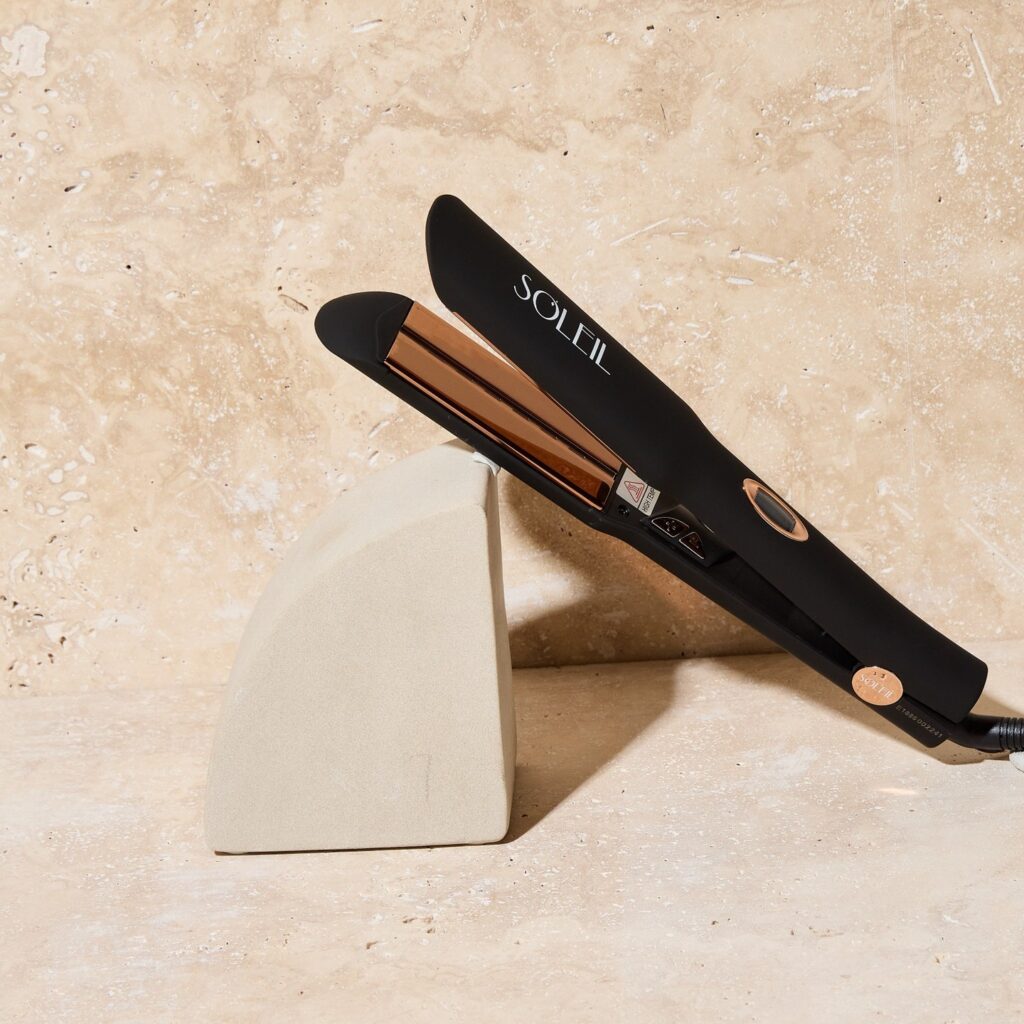
This one is an MVP for short-haired girlies. A flat iron is the most versatile and often the safest tool for short hair. The slim, straight plates allow you to get incredibly close to the root without the bulk of a round barrel touching your scalp. It creates soft bends, flicks, and textured waves, which is exactly what short hair needs.
- Ideal Plate Width: For pixies, a 0.5″ to 0.75″ plate is best. For bobs and lobs, a 1″ plate is perfect.
- Look for: Beveled or rounded edges on the plates. This prevents sharp crimp lines when you rotate the iron.
B. Mini Curling Wand (0.5″ to 0.75″ Barrel)
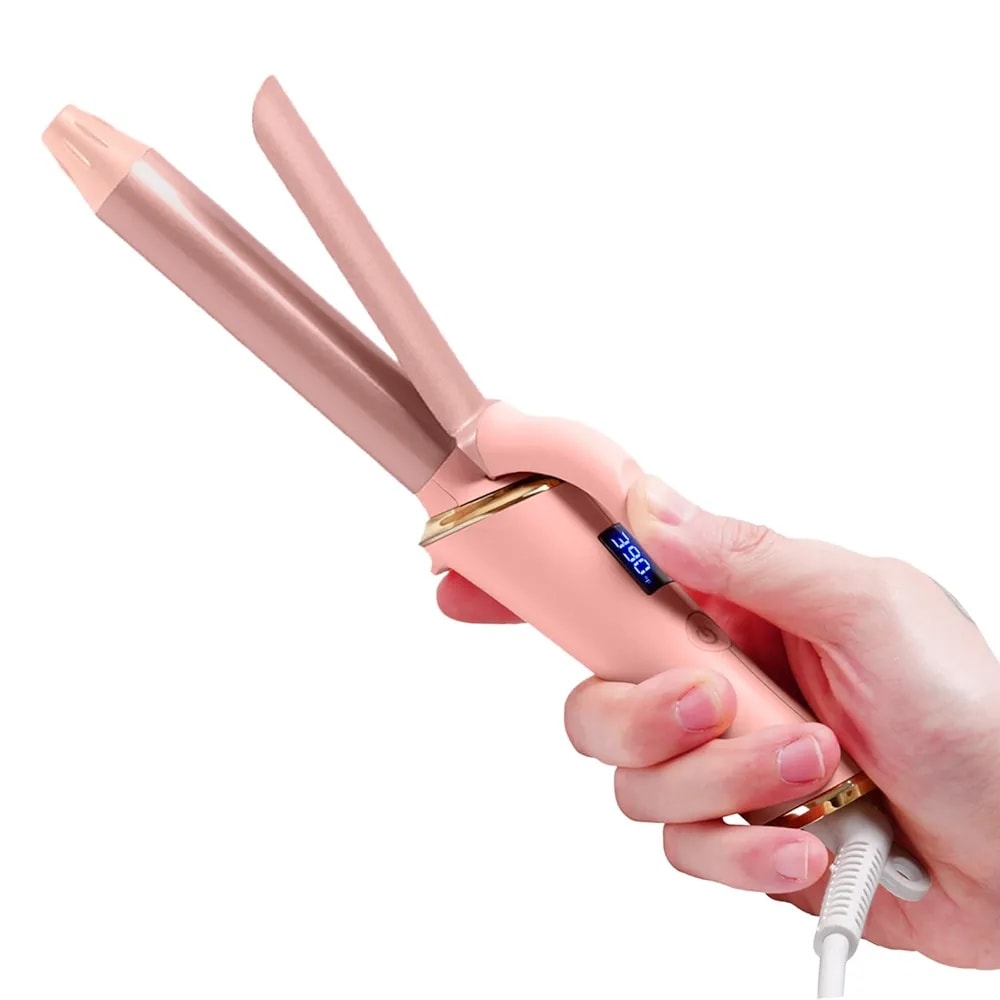
A standard 1.25″ curling wand is too bulky for short layers. It creates curls that are too large and can look like awkward barrels. A mini wand with a small barrel creates defined, piece-y texture and loose waves that are proportionate to short hair.
- Barrel Types: A tapered wand (wider at the base, narrower at the tip) is excellent for short hair because it creates varied curl sizes and a more natural look.
- Clamp vs. Clampless: A clampless wand is generally easier for short hair because there’s no clamp to get in the way of wrapping small sections.
C. Small Round Brush and Blow Dryer
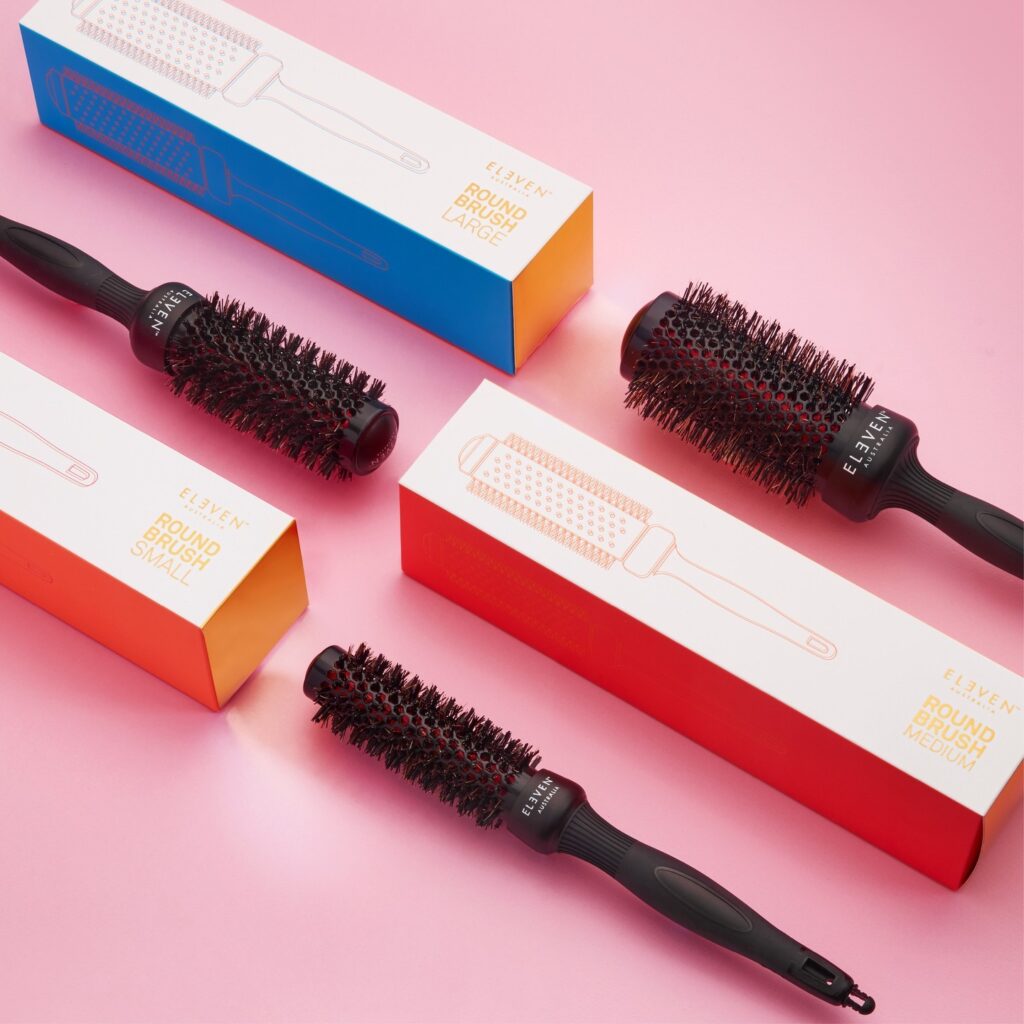
This is best for creating volume and a soft “bend” without any tight curls. This is the healthiest option for short hair and the foundation of a classic blowout.
- Size: A 1-inch or 1.5-inch round brush is ideal for bobs and lobs. For pixies, a 0.75-inch brush can be used to lift the crown.
- Technique: This method relies on tension and heat from the dryer to shape the hair, rather than direct contact with a hot metal tool.
D. Velcro Rollers (Small Size)
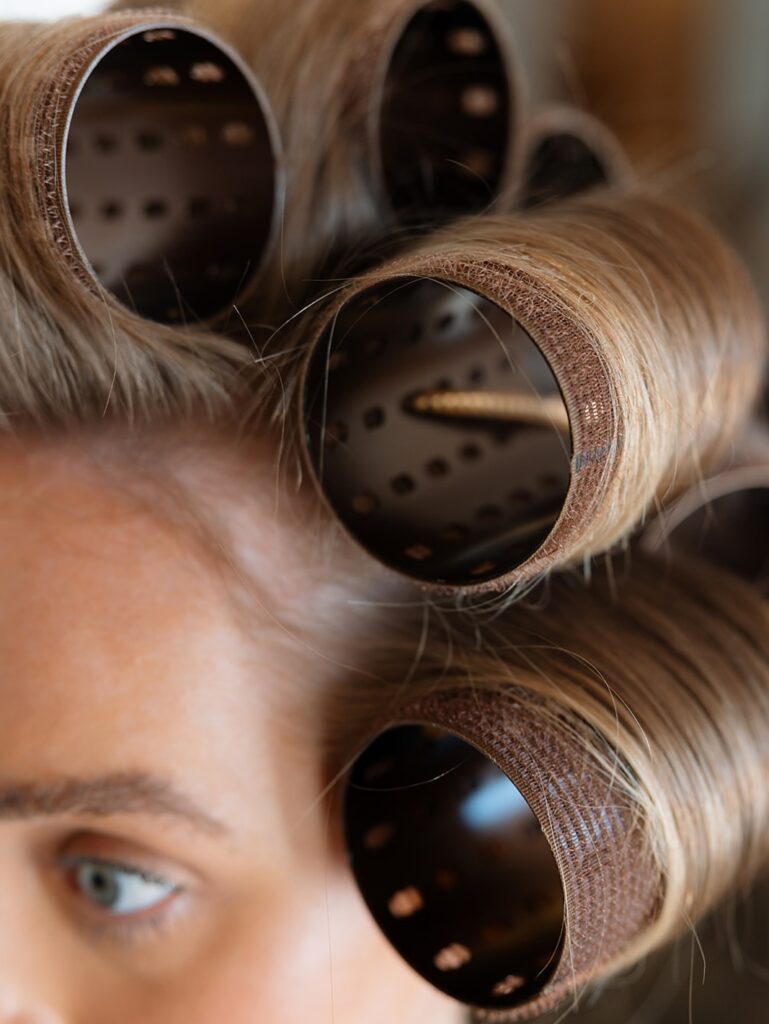
This one is amazing! I like to add lift at the roots and a soft wave without any heat damage, and this does exactly that. This is a fantastic option for fine hair that falls flat easily.
- Size: Use 0.5-inch to 1-inch rollers. Smaller rollers create more defined waves; larger rollers create volume.
- Method: Roll sections of dry hair around the rollers and let them sit for 20-30 minutes while you do your makeup. The heat from your scalp helps set the shape.


Part 3: Core Curling Techniques for Short Hair
These are the fundamental motions you’ll use to create any style on short hair. Let’s get our basics right, shall we?
Technique 1: The Flat Iron Flick (For Soft, Modern Texture)
The Vibe: Effortless, bouncy, “I woke up like this” texture. It’s great for your pixies, bobs, and adding movement to the front pieces.
Step-by-Step:
- Take a 1-inch wide section of hair. If you have a pixie, take an even smaller section (0.5-inch).
- Clamp the flat iron near the root. To protect your scalp, use your tail comb as a barrier or simply clamp about half an inch away from the skin.
- Glide the iron down the hair shaft in a smooth, continuous motion.
- The Flick: Just before you reach the ends (the last 1-2 inches of hair), rotate your wrist. You can flick inward (toward your neck) for a classic flip, or outward (away from your face) for a modern, piece-y look.
- Let the ends slip out of the iron naturally. Do not clamp down on the very tips.
For a pixie, use this technique on the top layer and the pieces around your ears. It creates soft, touchable movement without making the hair look “done.”
Technique 2: The Mini Wand Twist (For Piece-y, Defined Waves)
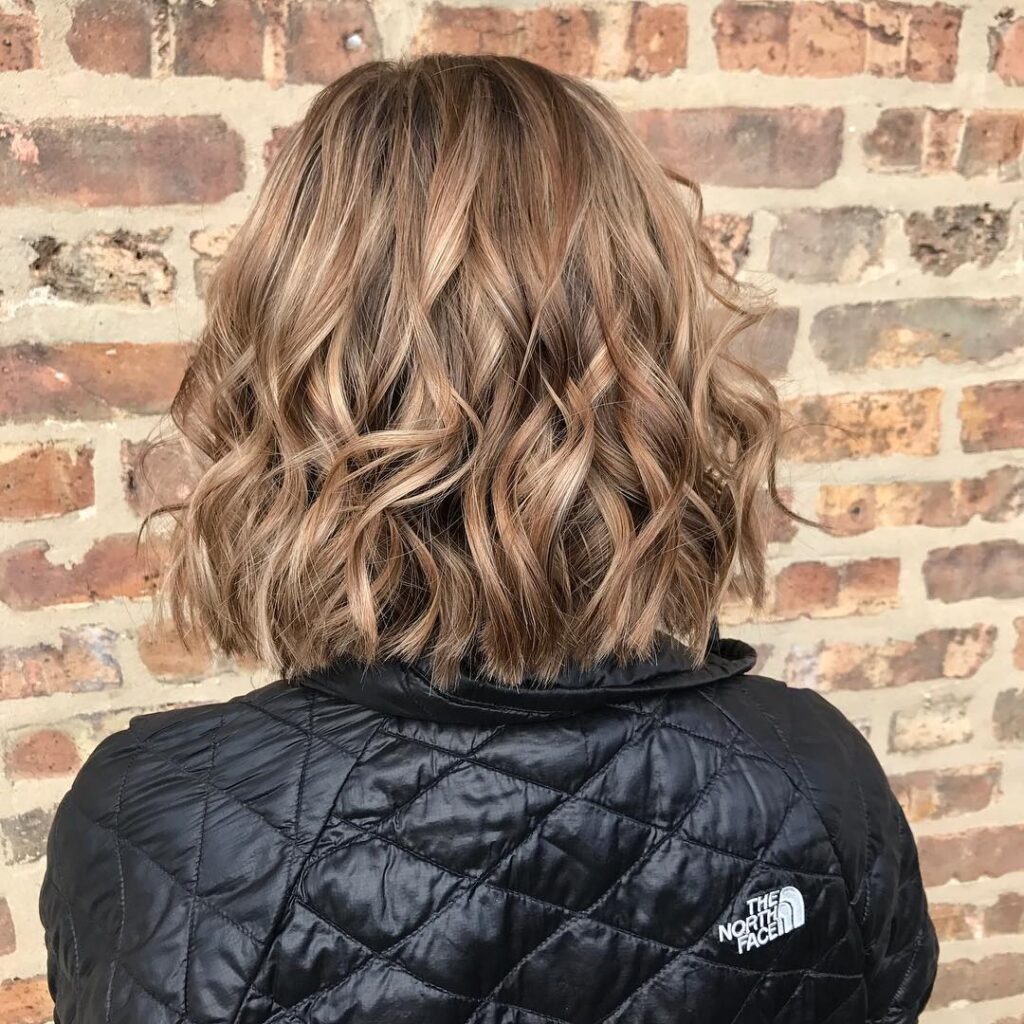
The Vibe: Textured, modern, “French girl” hair. Works well with your choppy bobs, shags, and layered pixies.
Step-by-Step:
- Use a 0.5″ or 0.75″ mini wand.
- Take a very small section of hair (about 0.5-inch wide). Short hair heats up fast, so small sections curl more effectively.
- Hold the wand vertically with the tip pointing down. Place the wand behind the section of hair.
- Wrap the hair flat around the barrel, away from your face. Do not twist the hair strand itself; keep it smooth like a ribbon.
- Crucial for Short Hair: Do not wrap the hair tightly or all the way to the scalp. Leave the roots straight. Leave the very ends slightly off the barrel for a modern, undone look.
- Hold for 3-5 seconds only. Short hair heats up much faster than long hair.
- Release gently and catch the curl in your palm. Hold it there for 10 seconds until it cools. This sets the shape.
Technique 3: The Round Brush Bend (For Volume and Smoothness)
The Vibe: Polished, bouncy, “blowout” look. This is my personal fav for your bobs and lobs when you want a smooth, rounded shape without tight curls.
Step-by-Step:
- Apply a volumizing mousse to damp roots and blow-dry until hair is about 80% dry.
- Take a 1-2 inch section of hair. Place a 1-inch round brush underneath the section, near the roots.
- Lift the brush upward and direct the blow dryer nozzle down the hair shaft (this smooths the cuticle). Follow the brush with the dryer.
- When you reach the ends, roll the brush under (toward your neck) or outward (away from your face) and hold the heat on the ends for 5-8 seconds.
- Hit the cool shot button on your dryer while the hair is still wrapped around the brush. This sets the bend.
- Gently unwrap the brush. Do not pull it out; let the hair slide off.
Technique 4: The Vertical Flat Iron Curl (For Elongated Texture)
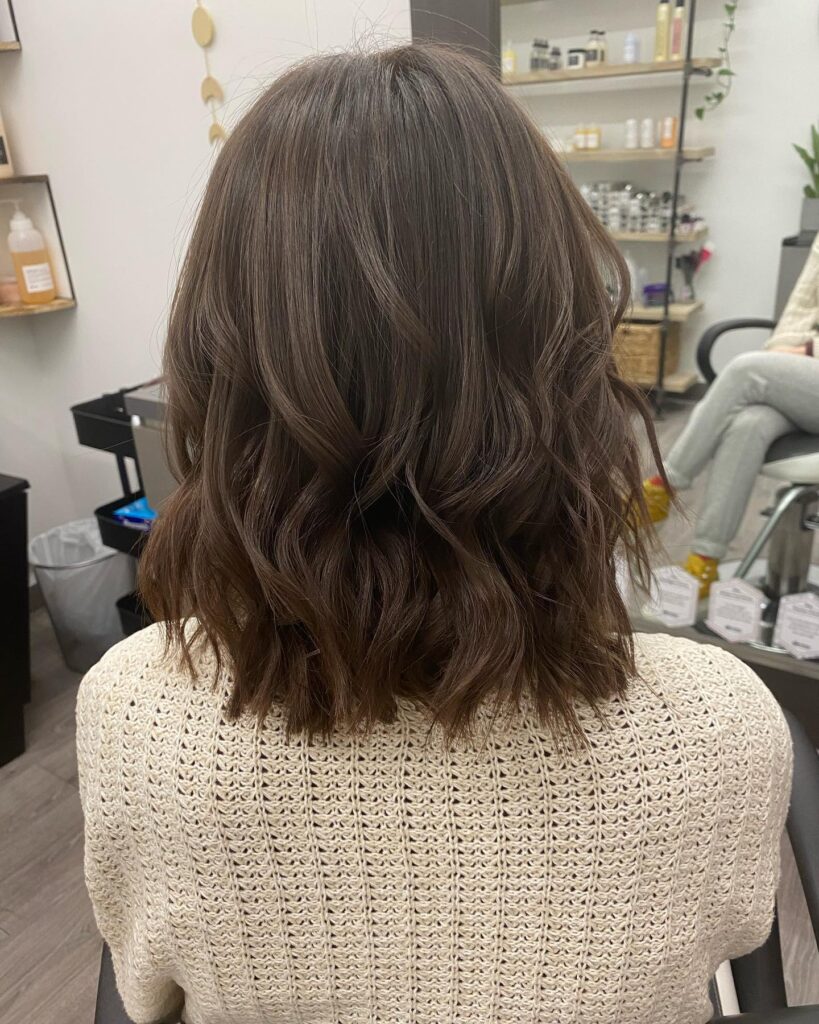
The Vibe: Modern shag, wolf cut, adds height without adding width. If you have short, choppy layers that need definition, especially at the crown, this should be your go-to.
Step-by-Step:
- Take a vertical section of hair at the crown of your head. Hold it straight up toward the ceiling.
- Clamp the flat iron near the root, with the iron pointing up toward the ceiling (not toward the wall).
- Rotate the iron 180 degrees (a half-turn) so the plates are now facing the back of the room.
- Pull the iron up and away from your head, gliding through the section.
- This creates a lifted, textured piece that adds height at the crown rather than bulk on the sides. It’s perfect for preventing the “flat head” look on short cuts.
Part 4: Step-by-Step Full Head Tutorials for Short Hair
Now let’s put those techniques together to create complete, wearable styles.
Style A: The Tousled Pixie (Effortless Texture)
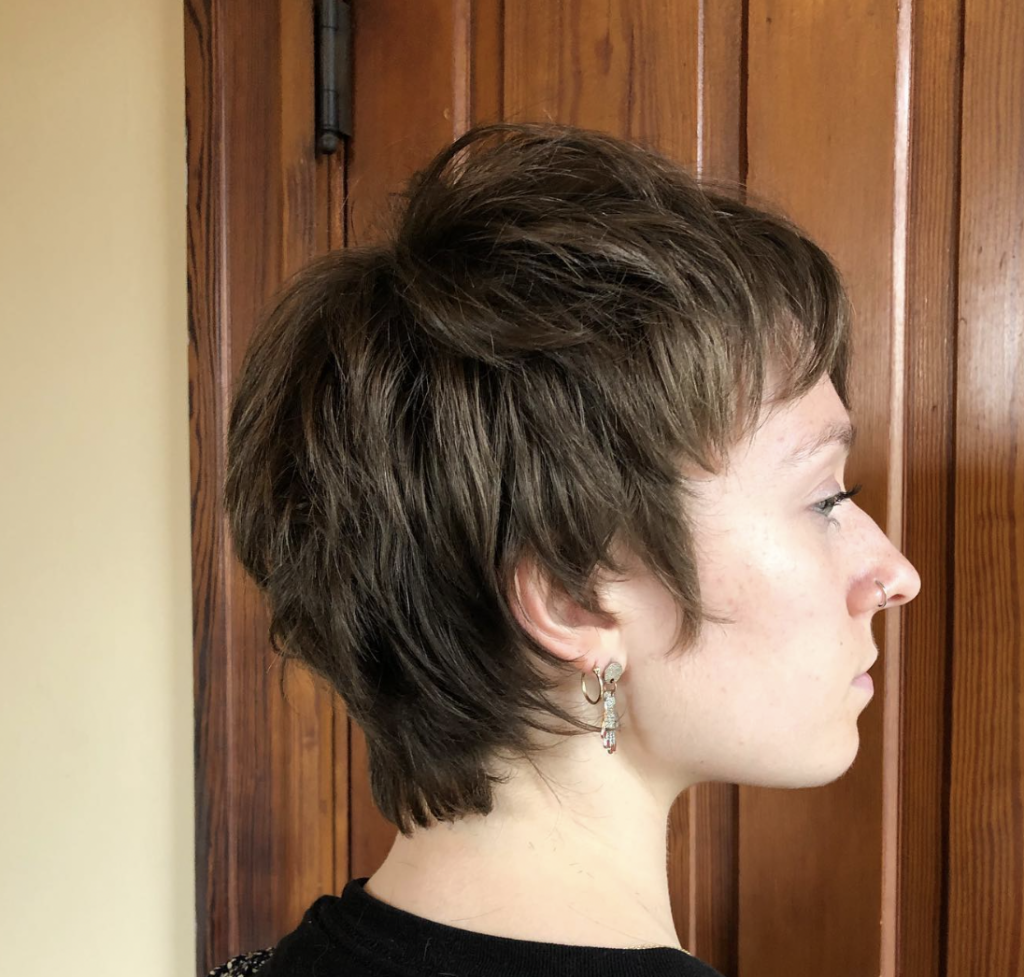
The goal here is to add movement and definition without making the hair look “fussy” or over-styled. One tool to swear by for this look is your handy dandy 0.5″ flat iron or mini wand.
Step-by-Step:
- Prep: Apply a texture spray or dry shampoo to dry hair. This adds grip and volume. Use your fingers to mess it up and distribute the product.
- The Crown: Use Technique 4 (Vertical Flat Iron Curl) on the very top section of your head. Take 2-3 small sections at the crown and curl them up and back. This creates essential height.
- The Sides and Back: Use Technique 1 (Flat Iron Flick) on the hair around your ears and at the nape. For the sides, flick pieces away from the face. For the back, flick pieces upward or slightly outward. You’re not creating full curls here; you’re creating subtle bends and texture.
- The Fringe/Bangs: Use the flat iron to create a soft side sweep. Clamp the iron at the root of the bangs, pull the iron across your forehead toward the opposite temple, and release with a slight inward bend at the ends. This keeps bangs from looking like a stiff curtain.
- Finishing: Do not brush. Use your fingers to shake everything out and muss it up. Take a tiny dab of texture paste or pomade (the size of a grain of rice) and rub it between your fingertips until it’s warm and invisible. Then, pinch the ends of random pieces all over your head. This defines the texture and adds a piece-y, separated look.
Style B: The Modern Bob Wave (Sleek Meets Texture)
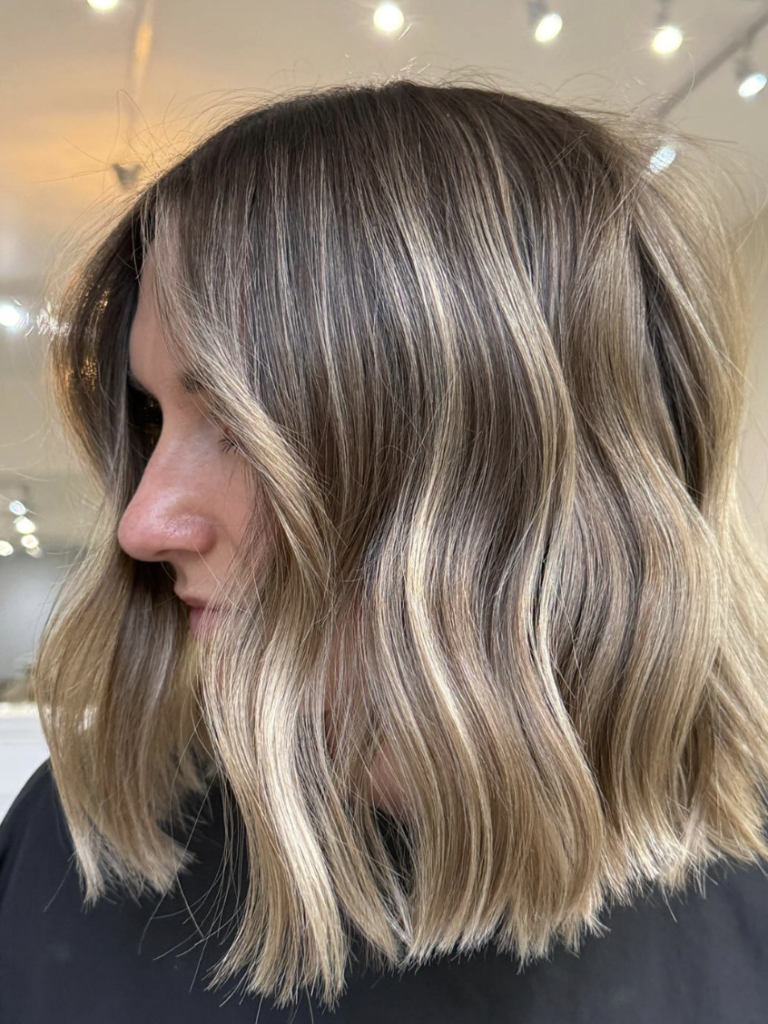
This is for when you wanna create a soft “S” wave through the mid-lengths while keeping the roots sleek and modern. Avoid the dreaded “mushroom head” shape. Your star hero tool for this look will be your 1″ flat iron and a wide-tooth comb.
Step-by-Step:
- Prep: Apply a smoothing cream to damp hair and blow-dry straight using a paddle brush. Create a deep side part. This is the foundation for this polished look.
- The “S” Wave Motion: Starting at the front of your heavy side part, take a 1.5-inch vertical section of hair.
- Clamp the flat iron at about cheekbone level (mid-shaft).
- Rotate the iron toward your face and glide down one inch.
- Then, rotate the iron away from your face and glide down one inch.
- Repeat this “C” shape inward, then “C” shape outward, all the way down to the ends. This creates a continuous, soft “S” bend.
- Direction Strategy: For the very front piece on the heavy side of the part, curl the entire section away from the face using a single rotation. This opens up the cheekbone and frames the face beautifully.
- The Back: Crucial step. Keep the back of the bob relatively straight or with a very subtle, loose bend. Do not curl the nape outward. Over-curling the back of a bob creates width and that dreaded “triangle” or “mushroom” silhouette. If you want movement in the back, curl the ends under toward the neck.
- Finishing: Let the waves cool completely. Then, take a wide-tooth comb and gently comb through the waves. This blends the “S” bends into one soft, cohesive wave. Set with a light, flexible hairspray.
Style C: Vintage Finger Waves on a Short Bob (Old Hollywood Glam)
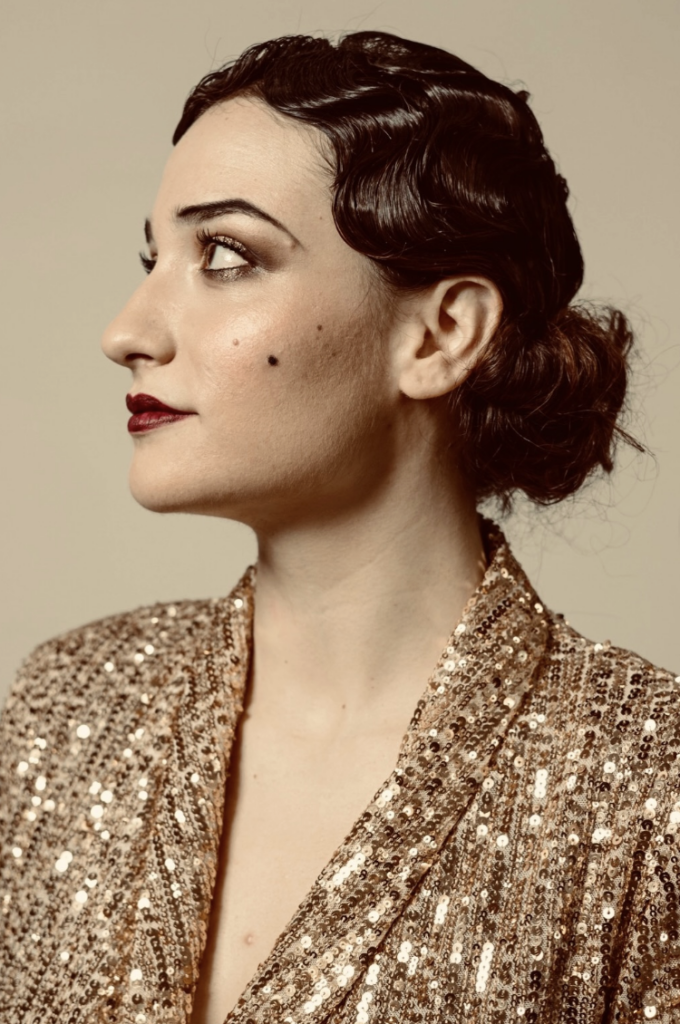
If you’re aiming to create sculpted, glossy “S” waves that lie flat against the head, this style is perfect for an elegant occasion. Your saviours would be some duckbill clips, setting lotion/mousse, blow dryer with diffuser (or hood dryer), and soft bristle brush.
Step-by-Step:
- Prep: Start with damp hair. Apply a generous amount of setting mousse or setting lotion from roots to ends. Comb it through to ensure even distribution. Create a deep side part.
- Forming the Wave: Using a rat-tail comb, place the comb at your part. Push the hair forward toward your forehead to create a raised ridge. This is the first “peak” of the wave.
- Immediately behind that ridge, use the comb to push the hair backward to create a “valley.”
- Continue this pattern down the side of your head: push forward (ridge), push backward (valley). The ridges should be parallel to your part.
- Clipping: This is the step that holds the shape. Take duckbill clips (the long, flat metal clips) and place them at each ridge where the hair changes direction. The clip should sit right in the “valley” between the ridges, holding the wave in place.
- Drying: You must dry the hair completely in this clipped position. Sit under a hooded dryer if you have one, or use a diffuser attachment on your blow dryer on low heat and low speed. Do not touch the clips. Wait until the hair is 100% bone dry. This can take 20-30 minutes.
- Removing Clips: Carefully remove all the clips.
- Brushing Out: Using a soft-bristle brush, gently brush through the waves in the direction of the hair growth. The sharp ridges will blend together into a smooth, continuous, sculpted wave. Do not over-brush.
- Finishing: Apply a light mist of shine spray for a glossy, red-carpet finish. Do not use hairspray with a strong hold; you want the waves to have slight movement.
Style D: The Curly Shag (For Naturally Curly or Permed Short Hair)
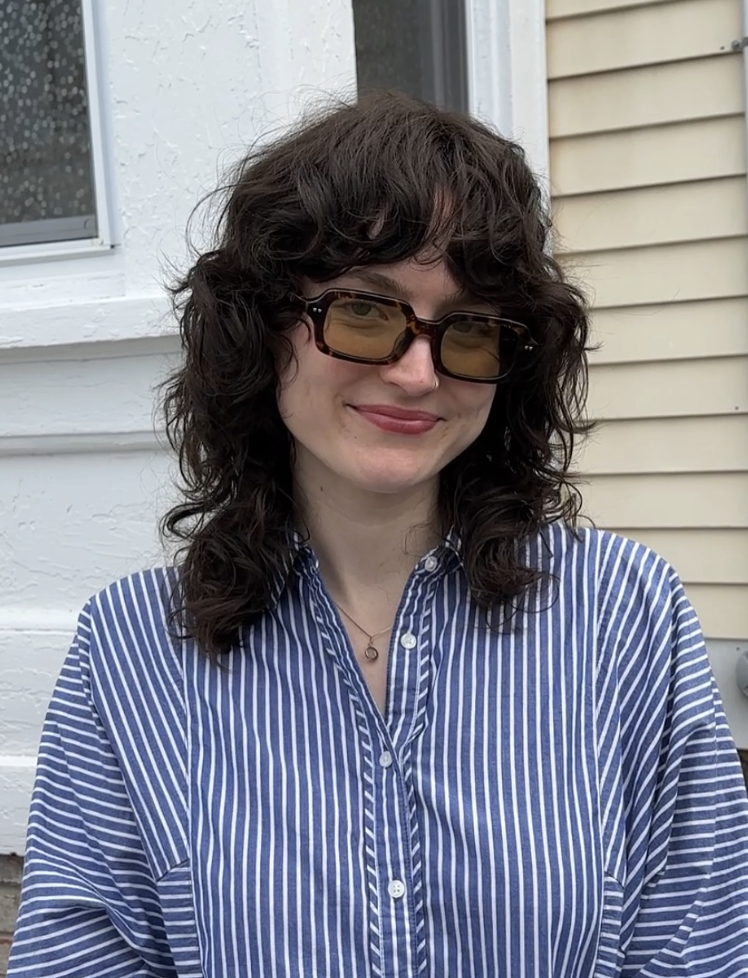
Are you looking to enhance your natural curl pattern and create a rounded, voluminous shape without frizz? You know what to do: start with a diffuser attachment, small curling wand (for touch-ups), hair pick.
Step-by-Step:
- Prep: On soaking wet hair, apply a curl cream followed by a curl gel. Use the “praying hands” method: smooth the product over the surface of the hair with flat palms, then scrunch upward. This defines curl clumps.
- Diffusing: Flip your head upside down. Use a diffuser attachment on your blow dryer. Set the dryer to low heat and low speed. High speed creates frizz.
- Cup sections of curls into the “bowl” of the diffuser and bring the diffuser up to your scalp. Hold for 15-20 seconds per section. Move around your head, drying the roots first. Continue until hair is about 90% dry. Let the last 10% air dry.
- Touch-Ups: Once dry, identify any curls that look flat, wonky, or frizzy. Use a 0.5″ mini curling wand to redefine those specific pieces. Wrap the hair around the wand in the same direction as the natural curl. Hold for a few seconds and release.
- Finishing: Flip your head upside down and shake it out. Use a hair pick to gently lift the roots at the crown for extra volume. If the gel has left a “crunchy” cast, scrunch your hair with a tiny drop of hair oil on your palms to break the cast and add shine.
Common Short Hair Curling Mistakes
Even with the best instructions, things can go sideways. Don’t worry! Here’s how to fix the most common short hair curling problems.
| Problem | Likely Cause | The Fix |
|---|---|---|
| I burned my ear/neck/fingers. | Tool too close to skin; no barrier used. | Always use a heat-resistant glove. Place a tail comb flat against your skin as a shield between skin and iron. Angle the wand away from your face. |
| My hair looks like a poodle (too poofy). | Barrel too large; curled too much hair. | Use a smaller barrel (0.5″-0.75″). Curl only the top layer and face-framing pieces. Leave the underneath layer straighter. After curling, use fingers to break up and pull apart the curls. |
| Curls make my bob look like a triangle/mushroom. | Curled the nape outward; curled sides too uniformly. | Keep the nape sleek. Curl the nape under toward the neck, or leave it straight. On the sides, alternate curl directions (one toward face, next away from face) to avoid a uniform bubble shape. |
| The curl falls out immediately. | Hair too clean/slippery; didn’t let curl cool. | Use texture spray or dry shampoo before curling. Let each curl cool completely in your palm or clipped to your head before releasing. For stubborn hair, use a flat iron (direct heat and pressure) rather than a wand. |
| My layers are sticking out in weird directions. | Curled all layers in the same direction. | Alternate the curl direction for each layer. Curl one layer toward the face, the next away from the face. This creates a blended, cohesive texture where pieces nest into each other. |
Finishing Products for Short Curled Hair
The products you use at the end are just as important as the technique.
- Texture Paste / Pomade: Essential for piece-y pixies and shags. Rub a tiny amount between your fingertips until it’s warm and invisible. Then, pinch the ends of random curls to define them. This adds separation and a “lived-in” feel.
- Flexible Hairspray: Avoid anything labeled “freeze hold,” “maximum hold,” or “helmet head.” Short hair needs movement and softness. Use a light, brushable, flexible hold hairspray. Mist from 10-12 inches away. I repeat
- Dry Texture Spray: This is the ultimate tool for refreshing second-day short curls. It adds volume at the roots and reactivates the texture in the ends without making hair feel dirty.
- Shine Spray or Lightweight Oil: Apply very sparingly. A single drop of oil rubbed between your palms and gently smoothed over the very ends can tame frizz and add polish. Too much product will make short hair look greasy and flat almost instantly.
Heatless Curling for Short Hair (Yes, It’s Possible!)
Want to give your hair a break from heat? These methods work beautifully on shorter lengths.
| Method | How To Do It | Result |
|---|---|---|
| Pin Curls | On slightly damp hair, take small 0.5-inch sections and wrap each around your finger to create a flat loop. Pin each loop against your scalp using bobby pins or pin curl clips and leave overnight. In the morning, remove the pins and gently finger-style the curls. | Creates soft, vintage-style waves with lots of volume and bounce. |
| Mini Flexi Rods | Apply mousse or setting lotion to damp hair and wrap small sections around mini flexi rods. Bend the rods to secure them, and let your hair dry completely before removing. Separate curls gently using your fingers. | Gives defined, springy curls with a more polished finish. |
| Sock Method (for Lobs) | Use a bathrobe belt or sock on the top sections of chin-length or longer hair. Wrap mainly around the crown and sides while leaving the lower layers out, then leave overnight. | Creates soft, effortless waves on the visible layers without too much bulk. |
Quick Reference Cheat Sheet by Short Haircut Type
| Haircut | Best Tool | Best Technique | Primary Goal |
|---|---|---|---|
| Pixie Cut | 0.5″ Flat Iron / Mini Wand | Vertical Flick / Twist | Add height at the crown. |
| Classic Bob | 1″ Flat Iron | “S” Wave / Flick | Create soft movement without adding width. |
| Lob (Long Bob) | 1″ Curling Wand | Beach Waves (ends out) | Loose, undone waves; keep roots sleek. |
| Shag / Wolf Cut | 0.75″ Wand | Alternating Direction Curls | Enhance choppy layers and overall volume. |
| Curly Pixie / TWA | Diffuser / Mini Wand | Define Natural Curls | Enhance existing curl pattern and lift roots. |
Short hair and curls are not the contradictory combination that myth has been insisting they are, and hopefully, this guide has made that case convincingly enough that you’re already reaching for your curling iron.
The techniques that work for short cuts are specific and learnable, and once you have them, the versatility of a pixie, bob, or lob becomes one of the genuinely great things about having less hair to manage rather than a source of frustration.
Start with the tool and technique that matches your specific cut, practice once or twice without the pressure of anywhere to be, and have fun with the process!